Why Before/After Photos Matter for Turning Roofing Jobs Into Lead Magnets

Before/after photos matter for roofing companies because homeowners want proof before they call. A clear photo pair can show the original roof problem, the work completed, and the finished result in a way that feels easy to understand. For a homeowner comparing contractors, that kind of visual proof can answer a trust question faster than a long paragraph.
For roofing companies, completed job photos should do more than sit in a phone gallery or get posted once on social media. They can support local SEO, Google Business Profile, PPC landing pages, service-area pages, sales follow-up, and AI-search visibility. This guide explains how roofers can collect, organize, and use before/after photos so finished projects become stronger lead magnets.
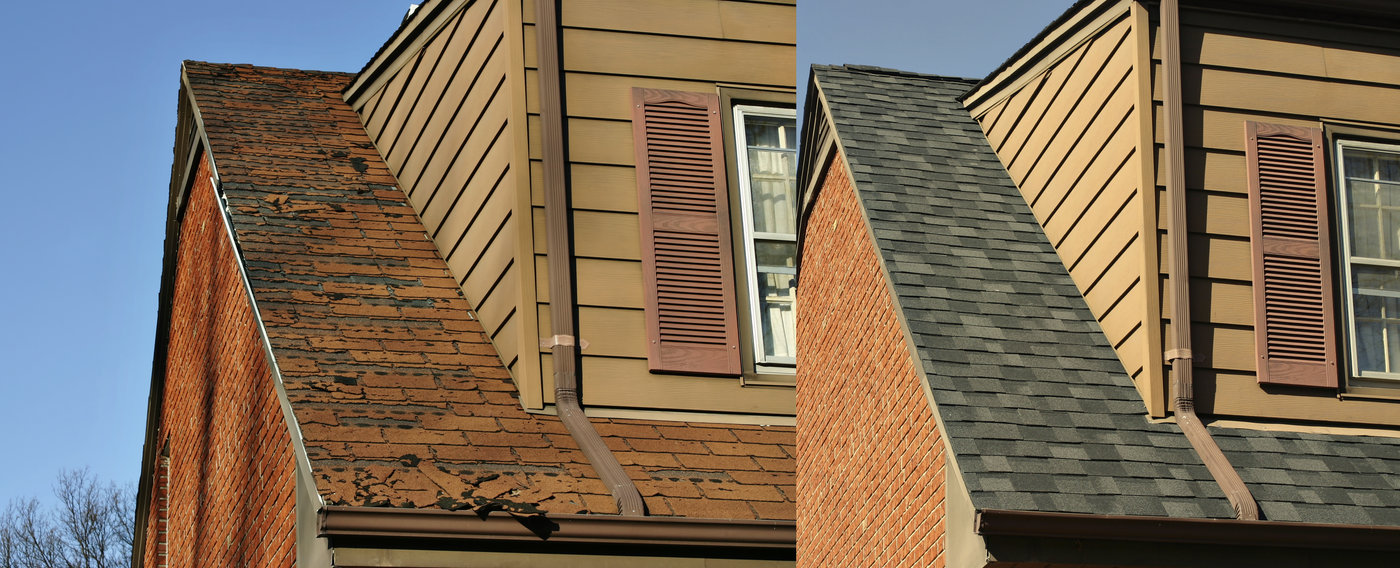
Why do before/after photos help roofers get more leads?
Before/after photos help roofers get more leads because they reduce doubt before the first call. Homeowners want proof that the contractor can diagnose the issue, complete the work, protect the property, and leave the home looking better than it did before.
A review says the company did good work. A photo shows what that work looked like. The strongest marketing uses both.
1. Photos make the problem easier to understand
Most homeowners do not know roofing systems well. They may not understand flashing, decking, underlayment, ventilation, pipe boots, ridge caps, or storm damage. A good photo pair makes the issue visible without requiring the homeowner to know the technical terms.
What the homeowner sees
They can see missing shingles, aging materials, hail impact, stained decking, a damaged roof edge, or a worn-out section.
What the photo should prove
The photo should make the starting problem clear enough for the homeowner to understand why an inspection, repair, or replacement was needed.
2. Photos make the result feel real
A finished roof photo is useful, but a before/after set is stronger because it shows transformation. It lets the homeowner compare the old problem with the completed work.
This is especially helpful for roofing lead generation because the photo answers a trust question before the sales conversation begins.
3. Photos help homeowners imagine their own project
A homeowner with a storm-damaged shingle roof wants to see a similar project. A commercial property manager wants to see flat roof work. A homeowner planning replacement wants to see color, texture, clean lines, and curb appeal.
Specific photos work better than generic ones because they match the buyer’s concern.
4. Photos make follow-up easier
Before/after photos also make follow-up more useful. After an inspection or estimate, a roofer can send a past project that looks similar to the homeowner’s roof type, material, damage, or neighborhood.
That kind of follow-up feels specific. It gives the homeowner something concrete to compare and helps the company stay memorable without sending another generic check-in.
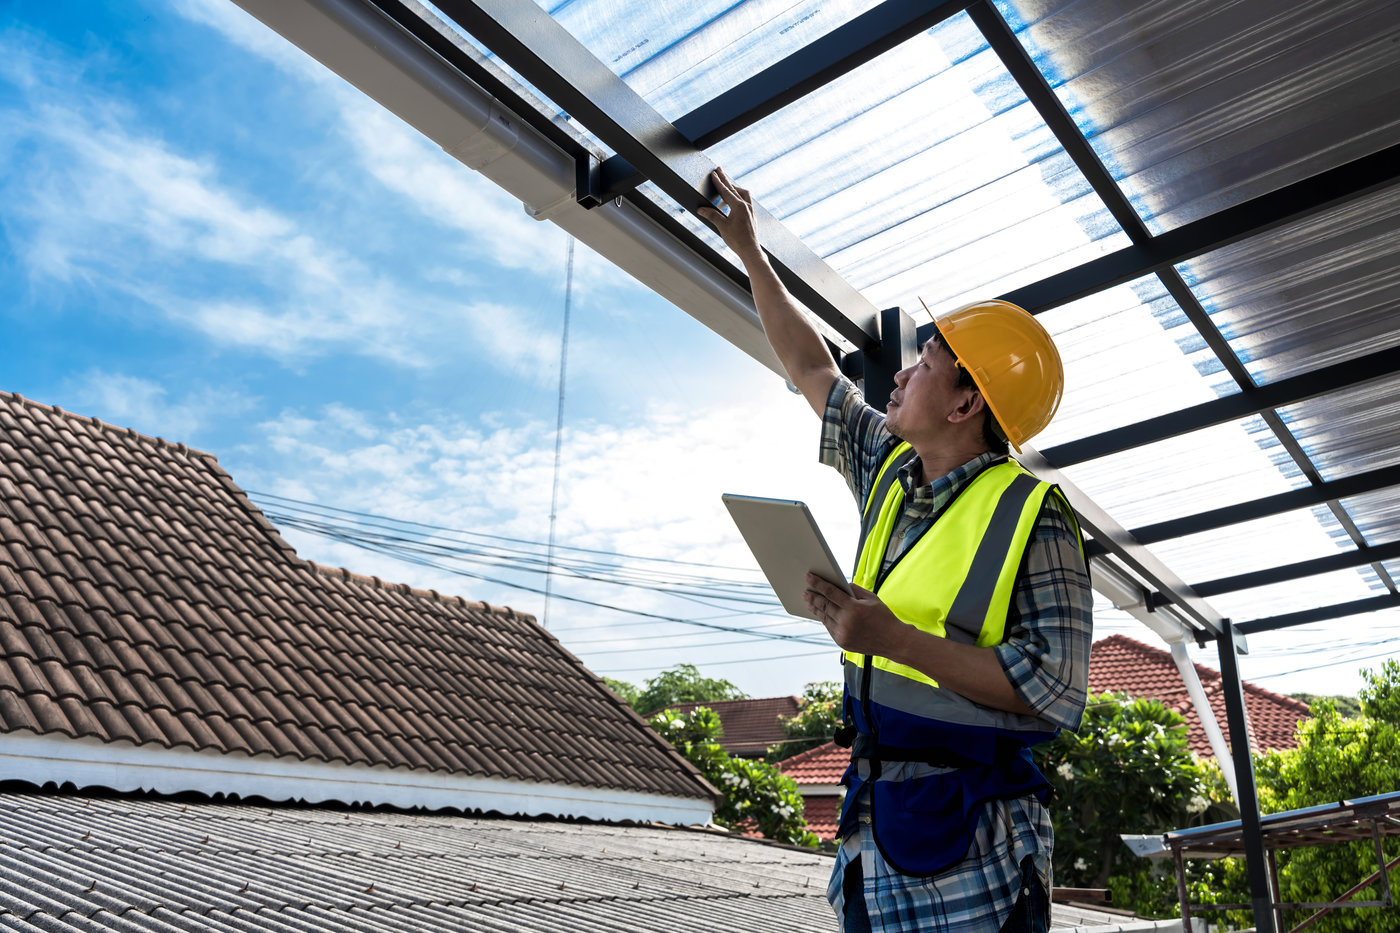
Which roofing jobs should be photographed?
Roofing companies should photograph any job that shows a clear problem, process, finished result, material choice, local context, or customer benefit. Full replacements are obvious, but smaller repairs can also become strong marketing assets.
1. Full roof replacements
Replacement jobs often create the strongest visual proof because the transformation is easy to see.
Photos to collect
- Front elevation before work starts
- Rear elevation before work starts
- Problem areas or aging materials
- Tear-off and decking condition
- Underlayment or flashing details
- Finished front and rear elevations
- Clean yard, driveway, and landscaping
2. Storm damage jobs
Storm work can support content, ads, and service pages because homeowners often search for local proof after hail, wind, or heavy rain. If the company already has a system for weather-related demand, these photos can support that type of strategy.
Photos to collect
- Missing shingles or lifted edges
- Hail marks on vents or soft metals
- Branch or debris impact
- Emergency protection
- Completed repair or replacement
3. Roof repairs
Repair photos help show that the company handles focused problems, not only large replacement jobs.
Photos to collect
- Failed pipe boots
- Damaged flashing
- Chimney or skylight leak areas
- Missing shingles
- Soft or damaged decking
- Completed repair area
4. Commercial roofing
Commercial photos help build trust with building owners, property managers, and facility teams.
Photos to collect
- Membrane condition
- Ponding water
- Seams and penetrations
- Coating or restoration work
- Finished roof sections
- Safety setup and clean access areas
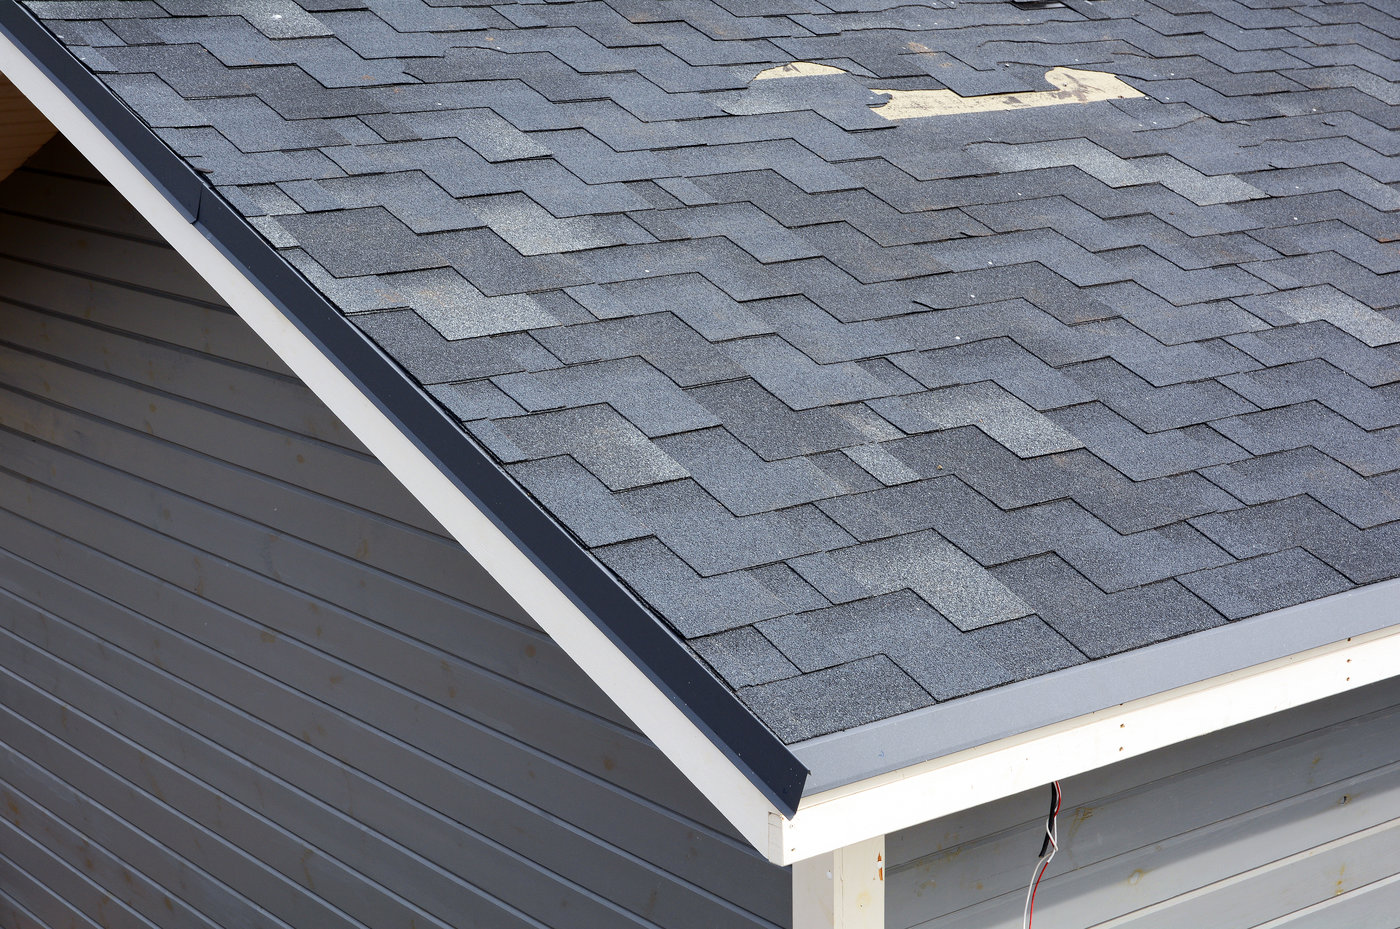
How should roofers take better before photos?
Roofers should take before photos that show the full context, the specific problem, and the area that will later be compared with the finished work. The goal is not to take a random picture of damage, but to make the starting point clear.
1. Start with wide shots
A wide shot helps the homeowner understand the whole roof, not only a close-up problem. It also helps future customers recognize similar homes, rooflines, materials, and project types.
Good wide shots
- Front of the home
- Back of the home
- Main roof slopes
- Visible roofline details
- Tree coverage or exposure when relevant
2. Add medium shots
Medium shots connect the full roof to the specific issue. They show where the damage sits on the roof.
Good medium shots
- Damaged roof sections
- Valleys
- Chimney areas
- Skylights
- Vents
- Roof edges
3. Add close-ups carefully
Close-ups are helpful when they show the issue clearly. They should not be the only before photos because a tight image can lose context.
Good close-ups
- Cracked shingles
- Hail impact
- Torn pipe boots
- Rusted flashing
- Exposed underlayment
- Damaged decking
4. Keep safety first
No marketing photo is worth a risky shot. Crews should avoid taking photos in unsafe conditions, especially on wet, icy, steep, or unstable roofs. A safe, clear ground-level photo is better than a dramatic image that puts someone at risk or makes the jobsite look careless.
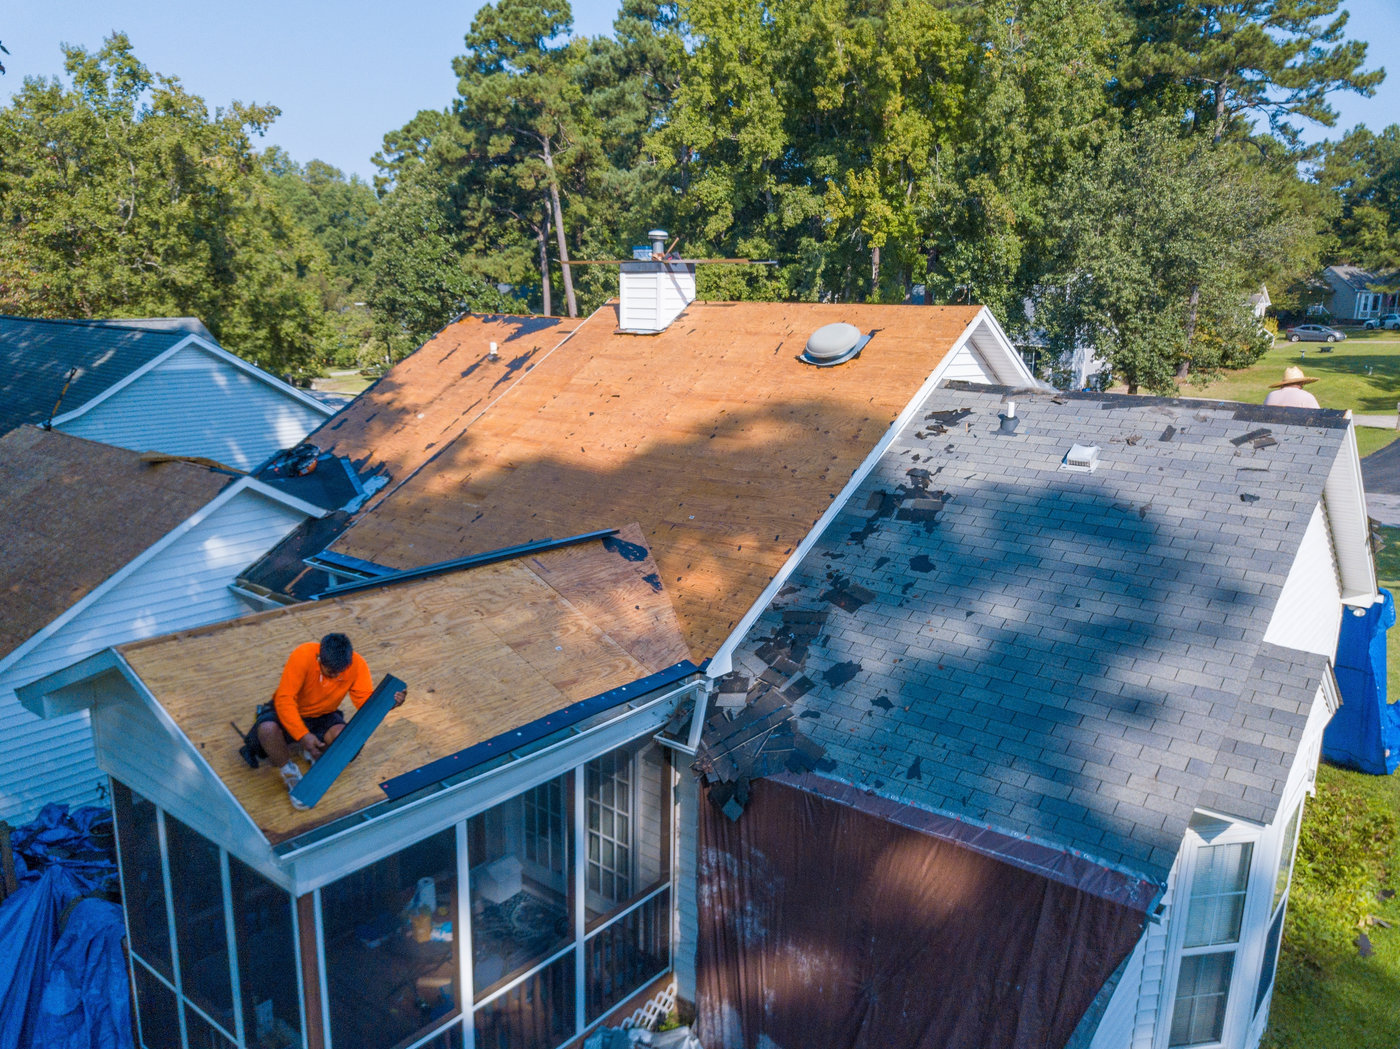
How should roofers take stronger after photos?
Roofers should take after photos from the same angles as the before photos whenever possible. Matching the angle makes the transformation easier to see and turns a normal job photo into a true before/after asset.
1. Match the original view
The after photo should show the same side of the home, roof slope, or repair area as the before photo.
What to match
- Distance
- Angle
- Orientation
- Roof section
- Lighting when possible
A matched photo pair looks more intentional. It helps the homeowner understand exactly what changed.
2. Show finished details
Finished detail shots help show workmanship. They can support sales conversations, service pages, and follow-up emails.
Good detail photos
- Valleys
- Ridge lines
- Flashing
- Pipe boots
- Vents
- Gutters
- Roof-to-wall transitions
3. Show the clean jobsite
Cleanup is part of the homeowner experience. Many customers worry about nails, debris, landscaping, pets, kids, and driveway access.
A clean after photo can show the roof and the property. That kind of proof can make a roofing company look more professional before the homeowner ever reads a review.
What process photos should roofers collect?
Roofers should collect process photos that show how the work was completed, not just what the roof looked like at the end. Process photos help explain value and make the finished result more believable.
1. Show what was found
If tear-off reveals damaged decking, poor ventilation, old flashing, or hidden leak paths, take photos. These images help explain why the project needed certain steps.
Useful discovery photos
- Decking damage
- Moisture staining
- Poor previous repairs
- Flashing problems
- Ventilation issues
2. Show the protection layers
Homeowners often compare estimates without understanding what happens under the shingles. Process photos can show the steps that protect the home.
Useful installation photos
- Decking replacement
- Underlayment
- Ice and water shield
- Valley preparation
- Flashing installation
- Ventilation upgrades
3. Show the crew working professionally
Crew photos should look safe, organized, and focused. They can support hiring, culture, social media, and trust. Avoid photos that show cluttered jobsites, unsafe ladder use, poor material handling, or anything that could raise questions about the company.
Where should roofing companies use before/after photos?
Roofing companies should use before/after photos anywhere homeowners compare proof, services, and local credibility. A strong photo should not stay buried in a phone camera roll.
1. Service pages
Service pages should include photos that match the service. A repair page should show repairs. A replacement page should show replacements. A storm damage page should show storm-related examples.
Best pages for photo proof
- Roof replacement
- Roof repair
- Storm damage repair
- Emergency roofing
- Metal roofing
- Commercial roofing
- Flat roofing
- Gutters
2. Location pages
Local project photos can make service-area pages feel more real. A page about roofing in a specific city should include proof from that market when possible.
This supports local SEO for roofers because the page becomes more than a location name. It shows actual work in the area.
3. Google Business Profile
A Google Business Profile for roofers should be updated with recent project photos. Google explains that Business Profile performance reporting can show how people find a profile and what actions they take, including views, clicks, calls, direction requests, messages, and bookings.
4. PPC landing pages
Roofing PPC works better when the landing page matches the ad. A hail ad should show inspection and storm proof. A replacement ad should show finished transformations. A leak ad should show repair credibility and a clear next step.
5. Sales follow-up
Photos can help after the estimate, too. A salesperson can send a past project that matches the homeowner’s roof type, material, or problem. That makes follow-up more useful and less generic.
How do before/after photos support local SEO and AI search?
Before/after photos support local SEO and AI search by adding service context, project proof, and visual evidence that helps explain the page. Images can appear in Search, Google Images, Discover, and other visual search surfaces when pages follow image best practices.
1. Photos add service context
A page with real project photos gives search engines more context when the surrounding text, captions, file names, and alt text describe the service accurately.
Example context
A photo caption can mention the service, roof type, project stage, and city without stuffing keywords.
2. Photos add local proof
A city page with a real replacement project, local caption, and helpful description feels more useful than a page with stock photos.
Better local caption
“Before and after shingle roof replacement in Plano after wind damage, showing missing shingles before the inspection and the completed architectural shingle roof after installation.”
3. Photos support AI-search visibility
Google’s AI optimization guidance says query fan-out can generate related searches to gather more information around a user’s question.
For roofing companies, that means one page may need to answer several related questions around the job, such as what happened, what the repair included, where the work was completed, and what the finished result looked like.
Strong project photos can support AI SEO for roofers because they help the page answer those related questions with real proof.
How should roofers write file names, captions, and alt text?
Roofers should write file names, captions, and alt text that describe the actual image in clear, useful language. The goal is to help people and search engines understand the image.
Google’s alt text guidance says alt text should explain an image in context and act as a functional equivalent for people who cannot view it.
1. How should roofers name image files?
Use file names that describe the image before uploading it.
Weak file names
- IMG_4821.jpg
- roofphoto.jpg
- finalroof2.png
Stronger file names
- hail-damage-roof-inspection-before-denver.jpg
- asphalt-shingle-roof-replacement-after-tampa.jpg
- wind-damage-missing-shingles-repair-austin.jpg
2. How should roofers write captions?
Captions can give more detail than alt text. They should explain the project in a natural sentence.
Strong caption example
“Before and after roof replacement in Tampa after wind damage, showing missing shingles before the project and a completed architectural shingle roof after installation.”
3. How should roofers write alt text?
Alt text should describe the image in context. It should not be a keyword list.
Strong alt text examples
- Before and after photos of a storm-damaged shingle roof replacement.
- Roofer inspecting missing shingles after high winds.
- Finished metal roof installation on a residential home.
- Commercial flat roof coating after ponding water repair.
What photo mistakes make roofing companies look less trustworthy?
The biggest photo mistakes are blurry images, mismatched angles, unsafe jobsite photos, missing context, and photos that look generic. A weak photo can make good work look average.
1. Only showing finished roofs
Finished roof photos are useful, but they do not always tell the full story. A before/after pair shows the problem and the result.
2. Taking photos too close
Close-ups are helpful, but they need context. A homeowner should understand where the issue is on the roof and what changed after the work.
3. Posting unsafe or messy photos
Photos should not show unsafe ladder use, scattered debris, poor material handling, or cluttered job sites. Those details can hurt trust.
4. Forgetting permission and privacy
Roofers should have a simple photo permission process. Avoid showing house numbers, license plates, faces, or personal details without approval.
5. Using fake or misleading proof
Project proof should be honest. The FTC’s endorsement and review guidance focuses on truthful, non-misleading marketing around reviews, endorsements, and testimonials.
Roofing companies should apply the same trust mindset to photos. Do not imply a project was completed by the company if it was not. Do not edit photos in a way that changes the truth of the work.
How can roofers build a simple photo workflow?
Roofers can build a simple photo workflow by giving crews a repeatable shot list, one upload location, and a clear review process. The easier the system is, the more likely it is to happen on every job.
1. Create a required shot list
Every job should have a basic photo checklist.
Simple roofing photo checklist
- Front before photo
- Rear before photo
- Main problem area
- Close-up damage
- Process photo
- Finished front photo
- Finished rear photo
- Clean jobsite photo
2. Use one upload location
Photos should go into one system, such as the CRM, shared drive, project management tool, or roofing software.
Label each upload with
- Job name or number
- City
- Service type
- Date
- Crew
- Permission status
3. Assign someone to choose marketing photos
Crews should collect the raw material. Someone in the office or marketing team should choose the best photos, write captions, rename files, and decide where each asset belongs.
4. Turn one job into multiple assets
One good project can become a website gallery item, Google Business Profile update, social media post, PPC landing page proof, email follow-up image, and sales example.
That is how a completed job becomes a lead magnet.
How do I find roofing companies that turn completed jobs into better leads?
RoofingROI Labs helps roofing companies use real project proof to build trust, improve visibility, and attract homeowners who are ready to schedule. Our team brings 15 years of industry experience, 200+ satisfied clients, and a marketing system built around SEO, AI SEO, PPC, website strategy, content, and campaign tracking.
From service pages and Google Business Profile updates to lead-focused landing pages, we help turn finished roofing jobs into stronger calls, form submissions, and booked estimates. Call us to find out how your completed projects could work harder for your business.